KNOWLEDGE / GIS & FIELD TOOLS
How to use a Survey Workspace: GPS points, map sketches and reliable field notes
A practical guide to capturing field observations, organising geometry and preparing records for professional review — without confusing an online map with a legal land survey.
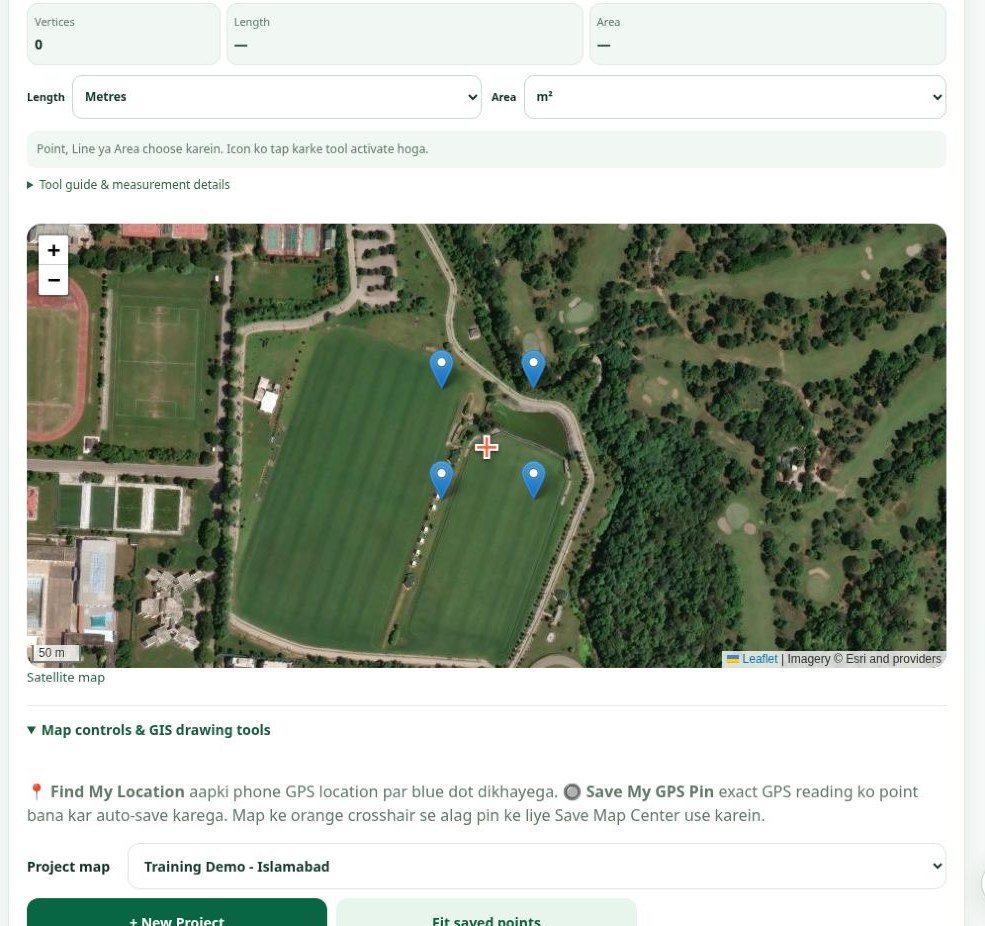
What this article covers: The free public-beta Pulse Hatch Survey Workspace supports planning and documenting field observations. It works without sign-in for local use; optional Google Drive backup requires connecting your own account. Phone GPS and map geometry are approximate working records, not cadastral proof or an engineering-grade survey.
Where the workspace is useful
1. Construction site walk-throughs
Before preparing a scope of work, record access points, obstacles, drainage observations, material-storage locations and open questions. A project can contain tasks, notes and reference pins, so the office team has a clear checklist to verify later. For example, a pin beside a proposed access route can carry a note about a culvert or existing utility; it is not a surveyed alignment.
2. Preliminary land and boundary discussions
Use map-center pins and polygon sketches to illustrate the area a client wants reviewed. Label each observation as approximate and attach available reference information. Do not treat the drawn outline or an estimated area as proof of ownership; legal boundaries require authoritative records and a qualified cadastral survey where applicable.
3. Drainage, pipeline and access planning
A line sketch can help a field team describe a proposed drain, pipeline route, access track or inspection walk. A polygon can group an area for follow-up measurements. The geometry is a communication aid; slopes, flow capacity, invert levels and buildable dimensions still need proper surveying and engineering checks.
4. Agricultural and environmental observations
During a farm visit, use separate point notes for water sources, erosion patches, vegetation changes and site photos. Keep the date, location source and the observer's notes so records remain useful when revisiting the site. The map does not establish ecological or hydrological findings on its own.
5. Team handover and training
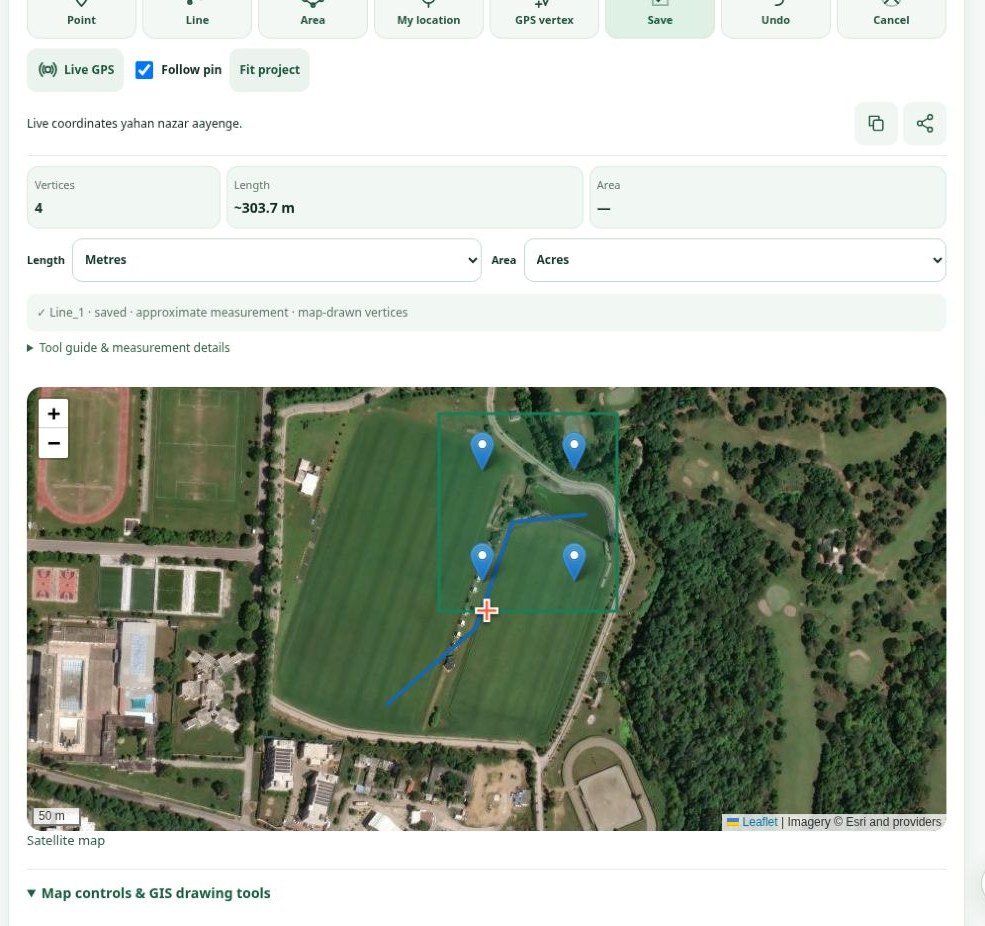
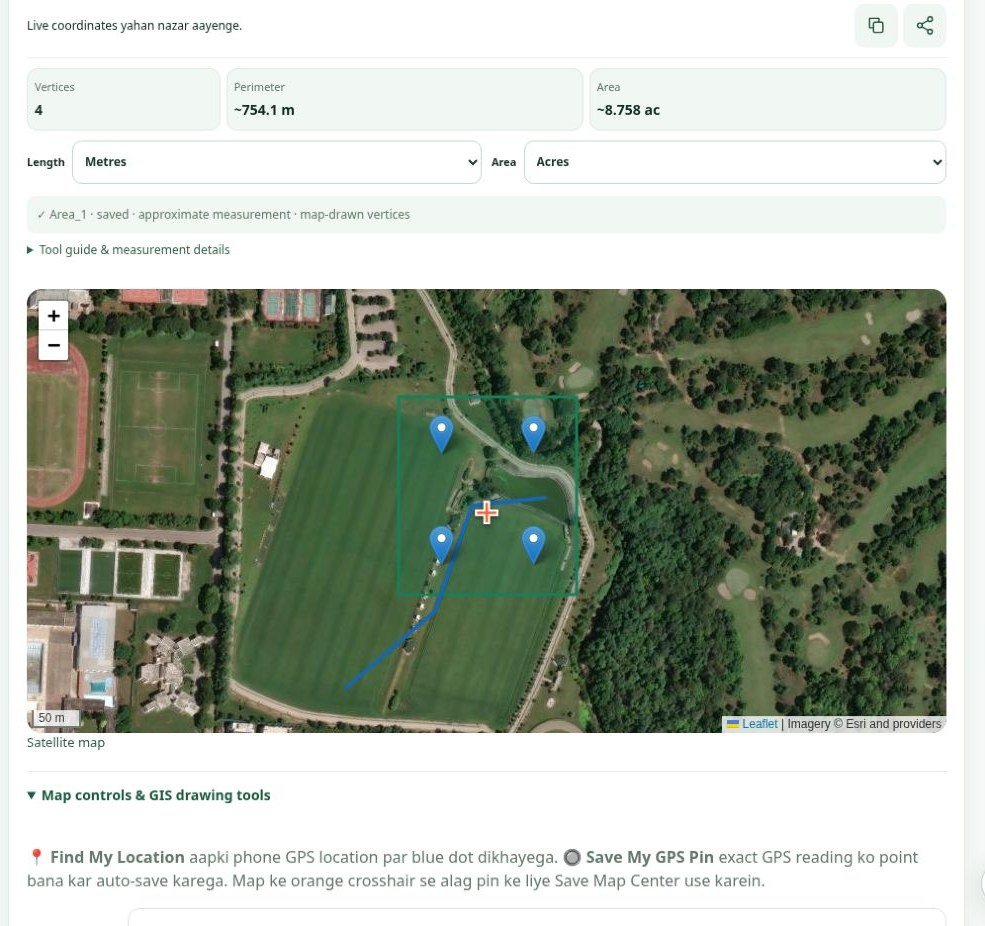
Students, junior survey assistants and site coordinators can learn the difference between map interpretation and measured evidence by creating four reference points, tracing a line and exporting a copy of their work. This lowers the risk of losing context between the site visit and desk review.
A practical field workflow — before, during and after the visit
- Prepare the project: create a project name, define today's purpose and add a task list. Avoid putting private client details in publicly shared captures.
- Open the map: use the default satellite view or switch to the road view to orient yourself. Confirm internet connectivity and that the imagery is only a visual reference.
- Choose the right location action: Find My Location centres on the device reading; Save My GPS Pin records a device location; Save Map Center places a reference at the map crosshair.
- Mark what matters: create a line for a route or polygon for an area by tapping map vertices and completing the drawing. Keep annotations descriptive, not falsely precise.
- Add field evidence: associate photographs, video, voice observations and remarks with a point where supported, and record the inspection context.
- Review and export: check names, point positions and geometry, then save/download the supported backup or GIS output. Verify that the export opens in your downstream application before relying on it.
- Handover: share only authorised project materials, note uncertainties and request a professional survey for construction, legal and design-critical decisions.
GPS pin versus map pin: an important distinction
GPS pin: based on the phone's reported location and its environmental/device conditions. Accuracy can change with trees, buildings, receiver quality and available satellite signals.
Map-centre pin: selected visually by moving the map beneath a crosshair; it is a map reference, not a new ground measurement.
For a formal survey, keep device metadata and verify coordinates with the appropriate survey equipment, known control and required coordinate system. Never turn an approximate tap into a claimed precise measurement by adding extra decimal places.
Keep the records: browser storage, exports and backup
For the public beta, records are saved in the current browser on the device. That is convenient on site, but browser resets, lost devices or shared-device access create risks. Download a backup before clearing browsing data; if using the optional personal Google Drive connection, verify the backup is actually saved and can be restored. Keep confidential client information out of uncontrolled devices and shared links.
The user manual includes visual steps for backup, recovery, restore, map settings and field capture, alongside an Urdu audio guide.
What the workspace can — and cannot — establish
This workspace helps with documentation, early planning, task management and communication. It cannot independently confirm plot ownership, legally binding boundaries, construction levels, engineering design, drainage capacity or professional survey accuracy. Field conditions, GPS uncertainty, source maps and exported geometry all require suitable validation for the intended decision.
When reviewing a real GIS deliverable, distinguish preliminary mapping from issued engineering documents. Pulse Hatch's Bhon Road GIS case study provides an example of how field records and terrain datasets can be organised into a planning atlas while keeping draft and source limitations visible. That separate client project should not be confused with a test of this browser workspace.
Try the workflow on your next site visit
Start with a small practice project: four reference points, one access-line sketch, one area outline, a photo note and a verified backup. Check the result with your field team before depending on it for a real decision.